Deflecto Craft Storage Solutions Review #SchoolsOutCraftsIn

Disclosure: Tryazon provided me with samples for this review. All opinions are my own.

I consider crafting one of my hobbies. Although I enjoy making things, craft supplies can become overwhelming. Deflecto is a company with a line of storage and organization solutions that are perfect for crafters. Here are my thoughts on some of the Deflecto products I received.

Expandable Marker Caddy

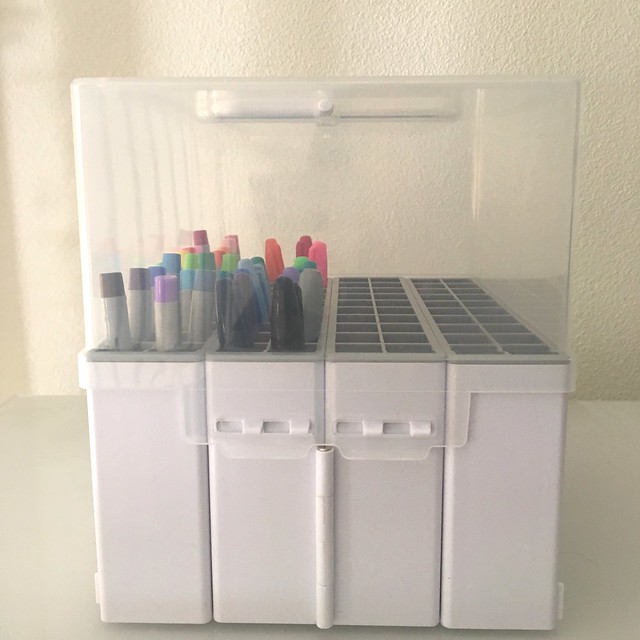
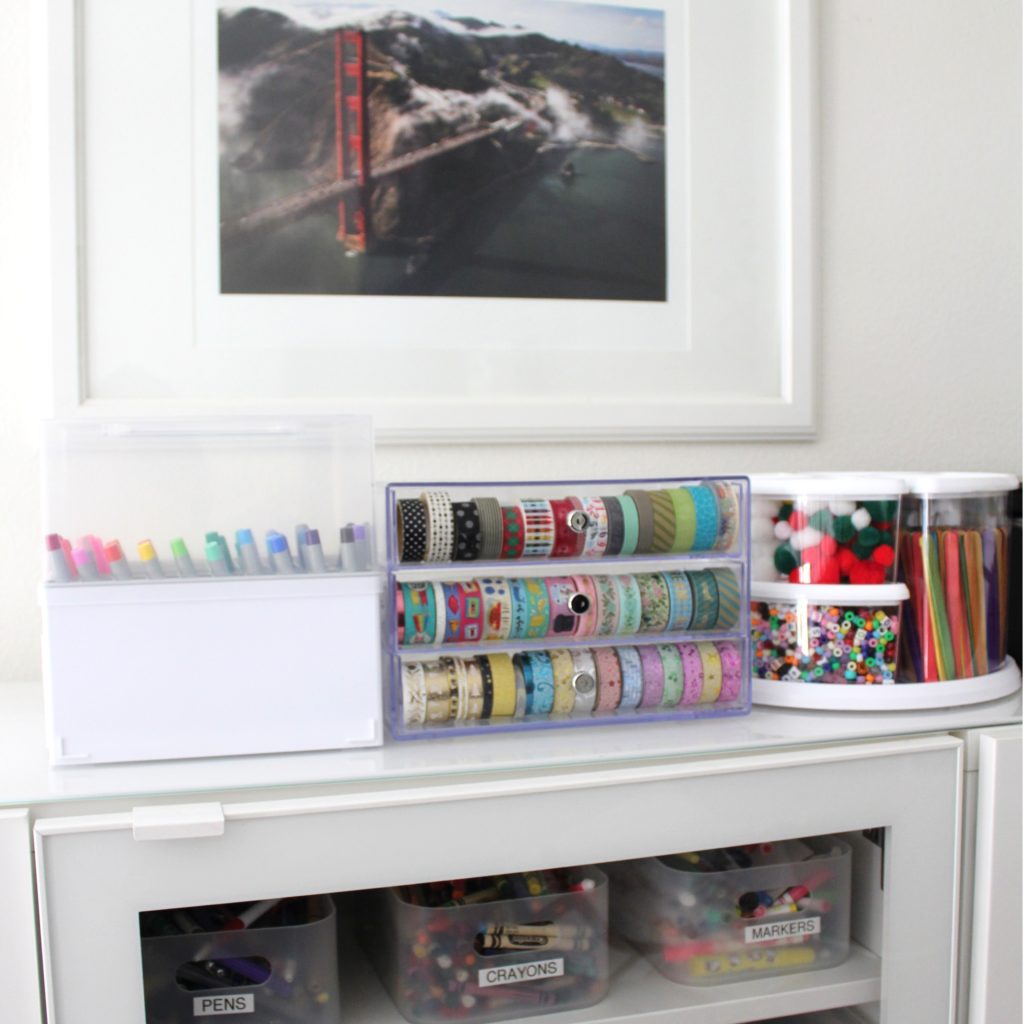
If you have a lot of pens or markers, the Expandable Marker Caddy keeps them all within easy reach. I like how there is a separate compartment for each pen. This case is extra tall which seems like wasted space for my normal size pens, but I suppose it would accommodate longer instruments such as paint brushes?

3-Drawer Organizer

I have been collecting washi tape, and this 3-Drawer Organizer is the perfect place to house my collection. I like that it is clear and that each drawer has three compartments. It could also be used for other small craft supplies as well.

Rotating Carousel Organizer

This Rotating Carousel Organizer acts as a lazy Susan for craft supplies. The different sizes of compartments fit nicely together and again, I like that they are clear.

Stackable Caddy Organizers

These Stackable Caddy Organizers are handy for organizing all of those odds and ends that do not take up much space but need to be separated. These Caddy Organizers can be stacked on top of a wheel base for mobility. There are also inserts that can be added on for extra interior compartments.

It is frustrating to craft when you cannot find the supplies you need. If you or a crafter you know needs some help organizing, these Deflecto products are worth considering. They can be found at Michaels and Target.

Continue Reading

You may also like

Full STEAM Ahead For Success

This post is sponsored by Galileo Camps but the content and opinions expressed here are my own.

We are a participant in the Amazon Services LLC Associates Program, an affiliate advertising program designed to provide a means for us to earn fees by linking to Amazon.com and affiliated sites.

There is no question that our world is quickly changing. Now, more than ever, it is important for kids to learn how to create, innovate and be risk-takers who are not afraid of making mistakes. One way that parents can teach these skills to their kids is to find STEAM (Science, Technology, Engineering, Art, Math) projects that encourage hands-on, creative learning.

The Zoom, Fly, Bolt, Blast Steam Handbook contains 18 fun STEAM projects based on the innovative curriculum implemented by Galileo Camps. We chose two projects from the book to do with friends. The first project we tried was called “Straw Tower”. The project involved building a straw tower using only straws and tape. The challenge was to build the tower taller than the shortest member of the group.

I liked how this project encouraged collaboration skills since the kids needed to work together. Through trial and error, their team also quickly learned which types of connections create the strongest structure.

Mission accomplished!

The second STEAM project we chose was the Hungry Octopus.

The design challenge was to build an octopus that has eight tentacles that can pick up a ping pong ball. The directions and pictures were simple to follow.

Pulling on the pipe cleaners makes the foam strip tentacles move up and down, allowing the octopus to “eat”. The kids thought the end result was pretty cool!

I would highly recommend The Zoom, Fly, Bolt, Blast Steam Handbook for developing STEAM-minded kids. My kids have already bookmarked several other projects to do this summer.

Register Now For Galileo Camps!

Another way to provide valuable STEAM educational experiences for your children is to sign them up for Galileo Camps. Galileo Camps have been around since 2002 and are designed for kids pre-K through 8th grade.
Check out the programs Galileo offers near you. Now is the time to register your children for their summer sessions!

I also have a special discount for my readers! Save $30 on your camp purchase with code SUMMER30

Discount valid at any Camp Galileo or Galileo Summer Quest location for the 2019 season, where space is available. Combinable only with Multi Session and Refer A Friend discounts.

Continue Reading

You may also like

Organizing for the New Year With Scrigit Scrapers (Review + Giveaway)

Disclosure: I received samples in exchange for an honest review. All opinions are my own.
We are a participant in the Amazon Services LLC Associates Program, an affiliate advertising program designed to provide a means for us to earn fees by linking to Amazon.com and affiliated sites.

The new year has inspired me to declutter and organize. One tool that has helped me with various projects around the house is the Scrigit Scraper. If you have never heard of Scrigit Scrapers, they just might be the tool you never knew you needed!

The Scrigit Scraper is a pen-shaped tool that is made of a durable but non-scratch BPA-free plastic. It can be used to remove unwanted substances such as adhesive stickers, labels and grime, without damaging surfaces. I must admit I often use my fingernails for such tasks, and broken fingernails are usually the result! Scrigit Scrapers are much more effective and I would highly recommend them for cleaning and crafts.

I recently used Scrigit Scrapers for two home organizing projects. For the first project, I upcycled a plastic candy container into a container for office supplies.

When D brought this little plastic box of candy home from work, I immediately thought of ways I could reuse the container. I used a Scrigit Scraper to remove the label without scratching the box. Now the container is a cute way to store binder clips.

As I was working on this project, I noticed there were some grimy spots on my desk from a prior craft project. So I used my Scrigit Scraper to remove them!

My second project involved transforming a letter organizer into a charging station. It seems like our family has so many electronic devices to charge and the cords were getting out of control. A while back, my mom mentioned that she saw someone on Pinterest use a letter organizer (similar to the one I already had) to make a charging station. After putting the project on the backburner, I finally gave it a go.

The first step was to remove some yellow tape that I had put on the organizer years ago. It was stuck on there pretty well, so I used a Scrigit Scraper and saved my fingernails! I then used my brother in law’s cordless drill to drill some holes in the back for the cords to feed through. (Be smarter than me, however, and use a drill-bit extension if you are trying to go through a small opening!) I covered some chipped areas with decorative washi tape and made labels so everyone knows where their device belongs. We set up the charging station next to a power strip tower similar to this one so that we have enough outlets and USB ports to charge all of our devices.

Scrigit Scrapers can be purchased on Amazon. The 2-pack retails for $6.99 and the 5-pack retails for $11.99. Keep one handy in different rooms, or split a pack with a friend!

I am pleased to announce that the owner of Scrigit Scrapers is offering my readers the chance to win a Scrigit 2-pack, Scrigit 5-pack AND a $20 Amazon gift card!

Continue Reading

You may also like

DIY Halloween Costumes: Referee + Charlie Brown

The past couple of years n has been able to wear some hand-me-down Star Wars costumes.  Since he has outgrown them, we needed to come up with a new costume idea.  He agreed to be a referee.

I bought a cheap white polo and painted the stripes with black fabric paint from Michaels and painter’s tape.  I only painted stripes on the front because I was too lazy–ha!  We bought the black baseball cap from Michaels (the last one in the store!) and he already had the pants.

k went to a Halloween dance a couple of weeks ago and her friends all dressed up as different Peanuts characters.  She made her own Charlie Brown t-shirt with the same bottle of black fabric paint.  Again, I bought the yellow t-shirt from Michaels.  (What would I do without Michaels and their 40%-50% coupons?)

This year k wanted to hand out candy instead of going trick or treating.  Too bad we only had five groups of kids come by!

Continue Reading

You may also like

Unique Gourmet Popcorn: Pop Art Snacks Review + Giveaway

Disclosure: I received free samples in order to facilitate this review.  All opinions are my own.

Popcorn is one of my all-time favorite snacks.  I like that it satisfies my craving for salt and crunch without too much guilt compared to other snacks.

Pop Art Snacks is a company that makes gourmet popcorn with unique and interesting flavors.  The packaging is so bright and cheerful!  I was excited to have the opportunity to try out four of their varieties:

  • Hawaiian Sea Salt with Avocado Oil
  • White Cheddar Jalapeno
  • Rosemary Truffle
  • Nori Sesame

The Hawaiian Sea Salt with Avocado Oil flavor debuted at Expo West this past spring, but somehow I missed their booth.  I love how the ingredients are so simple: Non-GMO Popcorn, Avocado Oil, Natural Pacific Sea Salt.

The White Cheddar Jalapeno flavor definitely has a kick to it!  It might be a little too spicy for kids, but spice fans will like this one.  The white cheddar rounds out the spiciness.

As soon as you open the Rosemary Truffle, the aroma hits you.  Although I am not the biggest rosemary fan, I was surprised that I really enjoyed this sophisticated flavor.  Set a bowl of this flavor out as a hors d’oeuvre at your next fancy dinner party.

The Nori Sesame was naturally a big hit with my Asian American family.  I am still surprised to see how “mainstream” nori has become, but it seems to be a flavor that a lot of people enjoy these days.  I like how this is a flavor of popcorn that you cannot find just anywhere.

All of the flavors use non-GMO corn, are gluten-free, air-popped, and have no trans fat or MSG.

Why not make a Pop Art popcorn bar at your next gathering and let your guests decide which is their favorite?

My son and I had fun making origami paper cups to coordinate with each of the flavors!

Origami Popcorn Cup Tutorial


I think these pictures are easy to follow, but I will attempt to explain the steps as well:

1. Start with a square piece of paper.

2. Fold in half into a triangle.

3. Fold one corner of the triangle so that the top is parallel to the bottom of the triangle.

4. Fold the opposite corner of the triangle in the same way.

5. Fold top triangles down and tuck into the cup.

6.  To make the cup stand up, flatten the bottom and place a weight, like a little piece of candy in the bottom to help it stay upright.

These paper cups are so festive and easy to make!  They are perfect for serving popcorn and are easy to coordinate by choosing paper that matches your occasion.

Pop Art Gourmet Popcorn can be found at a store near you.  We were also thrilled to find three flavors at our local Cost Plus World Market on sale for $2.99!  We bought a bag of the Thai Coconut Curry because it sounded so intriguing.

You also have the opportunity to try this delicious popcorn for yourself.  Enter our giveaway for four bags of Pop Art Popcorn in the flavors pictured below!


Continue Reading

You may also like

Baby Shower Pretzel Rods

It has been a while since I have been to a baby shower.  However, I was happy to attend one last month for n’s teacher that he had in first grade (one of his favorites!)  When I asked if there was anything I could bring, the suggestion was decorated pretzel rods.  n was eager to help!

IMG_2592

First, I bought the supplies.  The pretzels were from Target.  I checked all of the bags to find the one with the least broken rods!  I bought the candy melts and sprinkles at Michaels.  I ended up needing about 1.75 bags of candy melts to cover one bag of pretzel rods.

IMG_2593

I followed the directions on the candy melts bag and microwaved them in a tall coffee mug.  The most difficult part was probably figuring out how to do 50% power on my microwave!  (This is an important step, as another teacher told me that her white candy melts did not melt properly when she tried to use full power).

IMG_2598

Next, we dipped the pretzel rods into the melted candy melts and let the excess drip back into the mug.  Using a tall mug made it easier to cover most of the pretzel rod.

IMG_2597

We then put the rods on a cookie sheet covered with foil and put the sprinkles on before the candy melts hardened.

IMG_2628

Yep, it’s a girl!

Don’t they look nice on the dessert buffet table?

Continue Reading

You may also like

Washi Wednesday: Upcycle a Coffee Can

My collection of washi tape has been slowly growing.  There are so many cute designs, so when there is a good sale, it is hard to pass up.  Here is an easy project where I put my washi stash to use.

Start with a clean coffee can (or any other cylindrical container).  Whenever I buy food, I try to think of alternative uses for the packaging.  I recently found this tube of school-themed washi tape at Michael’s for $5!

Peel off the label.  Since washi tape is usually not totally opaque, it is a good idea to have a solid background.  As you can see here, I did not bother scraping every last piece off and it worked out fine.

Apply the washi tape around the can, starting from the bottom.  I overlapped the tape just a little bit so that it completely covers the can.  The ridges of the can were a little tricky, but washi tape is very forgiving.  If it goes on a little crooked, it is easy to readjust.

This container is the perfect size for pencils.  I plan to use it at our homework station.  This would also make a nice gift for a teacher!

How do you use washi tape?  What containers do you upcycle?  I think Pringles cans would be fun, too!

Continue Reading

You may also like

Paint Without The Mess: Goliath Games Paint-Sation Easel Review + Giveaway

I received this product sample free for review.  All opinions are my own.

I must admit that I am one of those parents who limits messy art projects at home because I do not want to have to deal with the clean-up.  Well, Goliath Games Paint-Sation Easel Set offers a solution to this dilemma.  It claims to eliminate the messiness of painting by using paint pods that will not spill, even if turned upside down!

image

We put it to the test!

This is what comes in the box:

2018-04-11

Additional paint pods such as this are sold separately.

IMG_2017

Here is a closer look at the finger stamps that come with the additional paint pod.

2018-04-11

IMG_2040

The paint has a gel-like consistency, and truly does not spill when turned upside down!

IMG_2036

I like how the paint pods snap onto the easel.  It creates an all-in-one art station.

IMG_2037

“Hmm…what should I paint next?”

IMG_2050

k actually preferred to use the easel flat on the table.

IMG_2053

The kids had a lot of fun with this set.  The Paint-Sation Easel truly does allow budding artists to paint without the mess, which I appreciate as a mess-adverse mom!


We are a participant in the Amazon Services LLC Associates Program, an affiliate advertising program designed to provide a means for us to earn fees by linking to Amazon.com and affiliated sites.

Good news: Goliath Games has generously offered to give one of my readers a Paint-Sation Easel set of their own!

Continue Reading

You may also like

How To Make A Kaper Chart

Another school year is upon us.  I am not quite ready for our busy schedule again.  Both kids are continuing with their scouting.

I was enlisted again by my troop leader to make a kaper chart for k’s troop.  I have fun making them, so I don’t mind.  It is a challenge to come up with something different, cute and functional.  Here is a recap:

How to Make a Daisies Kaper Chart

Kaper Chart

How to Make a Brownies Kaper Chart

Brownie Kaper Chart

Easy Juniors Kaper Chart

P1040594

The bulletin board was $3, from Target’s Dollar Spot (a dangerous place for me). I used washi tape to make the lines and a label maker to write the jobs. The rest is pretty self-explanatory!

Continue Reading

You may also like

How to Make a Brownie Kaper Chart

k had her first official girl scout meeting as a Brownie today.  Two years ago, I made a kaper chart for their Daisy troop.  When our troop leader asked me to make a new one for Brownies, I wanted to come up with something a little different, but still simple. 

I originally found this idea on Pinterest, which is so useful for crafty ideas!  I used an old Ovaltine canister, which has a brown top, perfect for Brownies.  It also goes well with the girl scout motto of “using resources wisely”.  I covered the can with wrapping paper and modge podged the Brownie elf, which was from clip art online.  The kapers are written on labels that are glued around the can, and the clothes pins (which I still had from the Daisy chart) have the girls’ names.  The clothes pins can be stored in the can when not in use, which is handy. 

Continue Reading

You may also like